

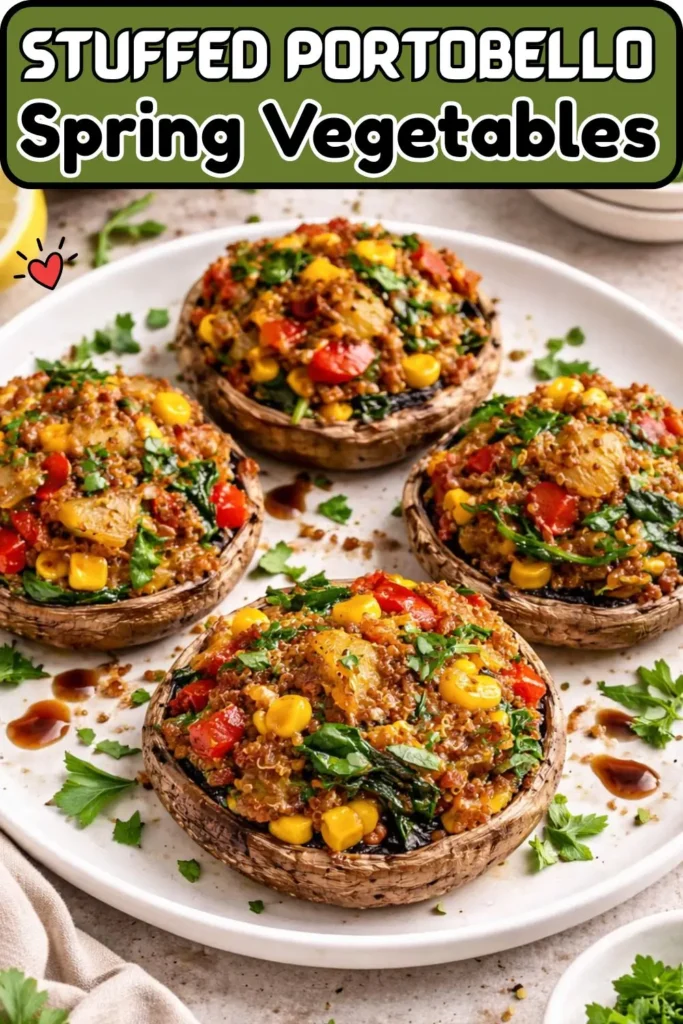
Here’s the thing about stuffed portobello mushrooms — they look fancy, taste incredible, and take absolutely zero culinary talent to pull off. If you’ve been sleeping on portobello caps as a spring dinner option, this recipe is your wake-up call.
I made these for a dinner party last spring — the kind where half the guests were skeptical vegans-for-a-night and the other half were convinced that vegan food couldn’t possibly be filling. By the time the pan hit the table, every single cap was gone in under ten minutes. Plates scraped clean. Zero leftovers. One very smug plant-based cook. 🙂
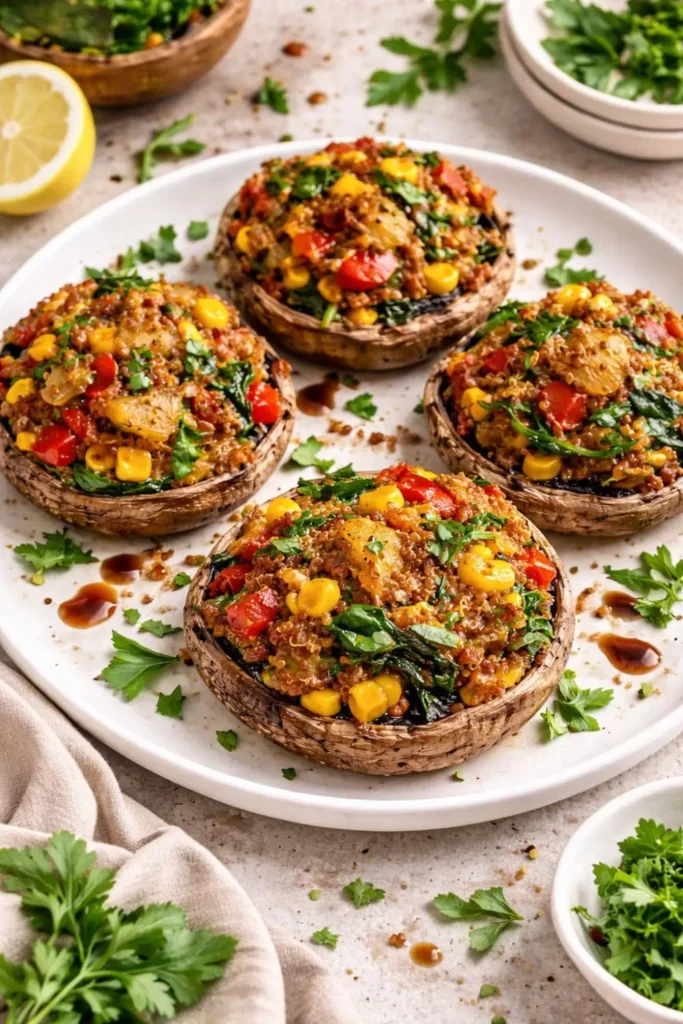
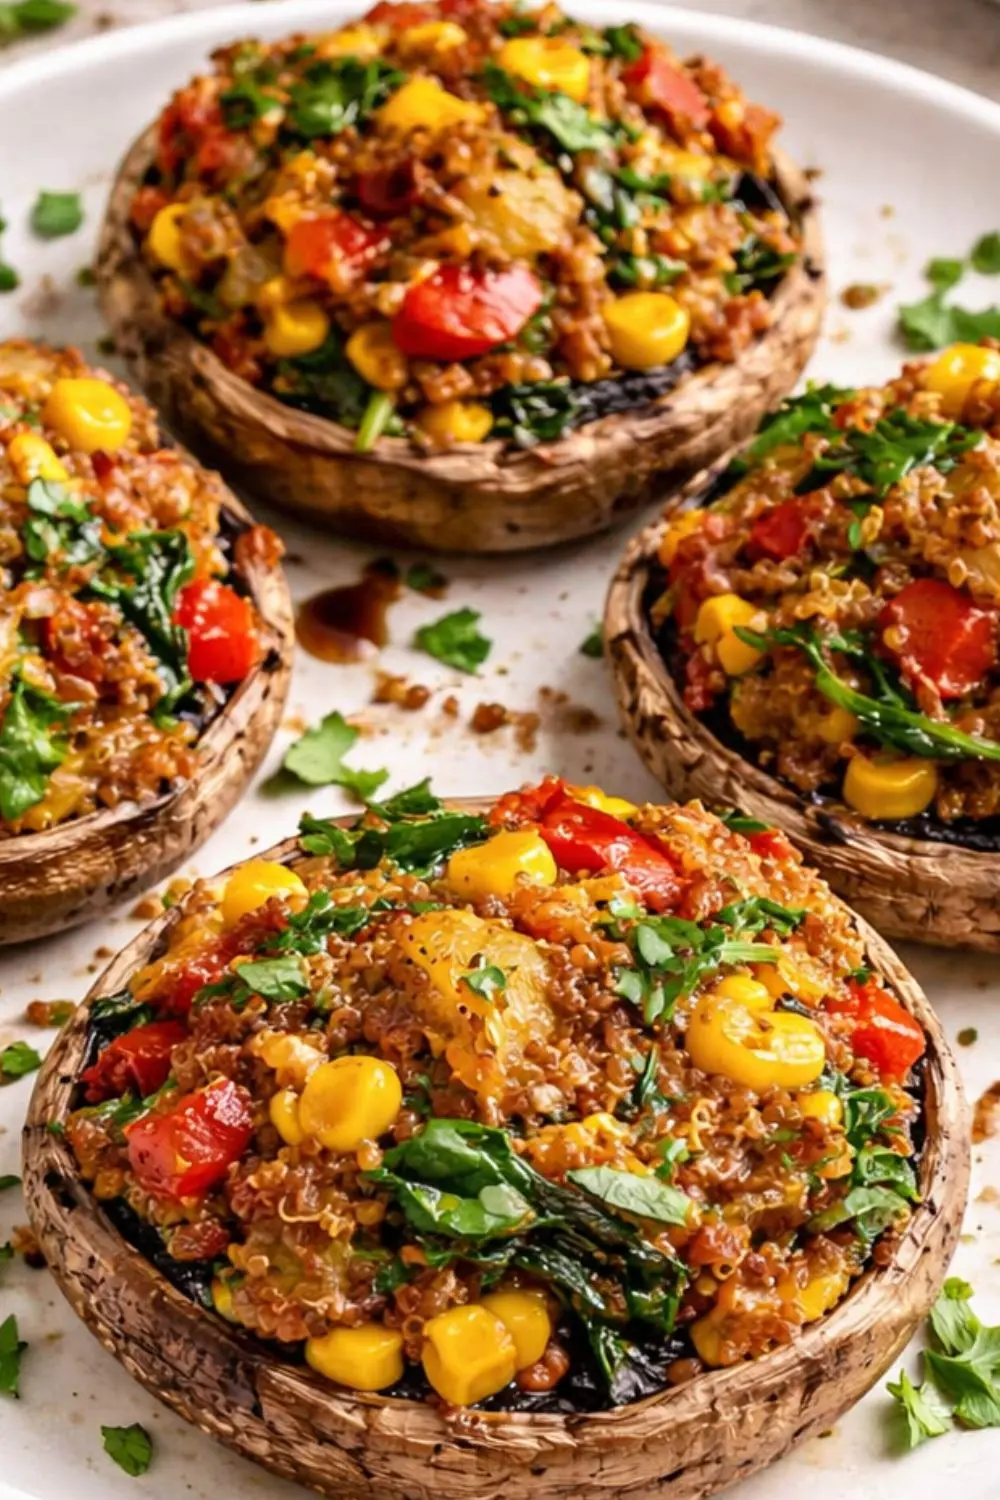
Vegan Stuffed Portobello with Spring Vegetables is everything a spring dinner should be: light enough to feel seasonal, hearty enough to actually satisfy, and beautiful enough to make you feel like you really cooked something special. And with only 104 calories per cap and a prep-to-table time of just 30 minutes, it genuinely has no downside.
So whether you’re meal-prepping for the week, cooking for a crowd, or just trying to do something exciting on a Tuesday night — you’re in exactly the right place. Let’s get into it.
| ⏱ PREP 15 min | COOK 15 min | SERVES 8 caps | CALORIES 104 kcal | DIFFICULTY Easy | DIET Vegan / GF |
Why This Stuffed Portobello Recipe Belongs in Your Spring Rotation
I know there are approximately one million vegan dinner recipes on the internet. So why does this one deserve a spot in your regular rotation? Glad you asked.
Portobello mushrooms are the ultimate vegan vehicle. Their wide, cup-shaped caps hold generous amounts of filling without spilling everywhere. Their meaty texture gives every bite real substance. And they roast up with this gorgeous, slightly smoky flavor that pairs brilliantly with fresh spring vegetables.
Beyond the mushroom itself, this recipe earns its place for three big reasons:
- Speed: 15 minutes of prep, 15 minutes of cooking. That’s dinner on the table in 30 minutes flat.
- Flexibility: The filling is endlessly customizable — use whatever spring vegetables you have on hand.
- Nutrition: Each cap packs 4g of protein, 3g of fiber, and a genuinely impressive vitamin profile — all at 104 calories.
FYI — this recipe also works beautifully as an appetizer, a side dish, or a main course, which makes it one of the most versatile things in my spring recipe arsenal.
Equipment You’ll Need
This recipe doesn’t ask you to haul out any specialized gear. Here’s everything you need:
- Large baking sheet: Line it with parchment paper for easy cleanup. A half-sheet pan (18×13 inches) fits all 8 caps perfectly.
- Large skillet: A 12-inch skillet gives you enough room to sauté all the vegetables together without crowding. Cast iron works beautifully here if you have one.
- Parchment paper: Non-negotiable for preventing mushroom sticking and saving yourself a 20-minute scrubbing session.
- Sharp knife + cutting board: For dicing your vegetables into even pieces so everything cooks at the same rate.
- Measuring spoons: For the spices — though honestly, this recipe is forgiving enough that eyeballing works too.
That’s genuinely it. No blender, no food processor, no special equipment. Just two pieces of cookware and a sharp knife. Pretty hard to say no to that.
Ingredients What You Need and Why Each One Matters
Every ingredient in this recipe earns its place. Here’s your full list with a little context on why each one works:
For the Mushroom Caps
- 8 large Portobello mushroom caps (wiped clean, stems removed) — Go large. You want caps that can hold a generous scoop of filling. Look for firm, dry caps with no soft spots or slimy patches.
For the Filling
- 2 tablespoons olive oil — The base fat for sautéing. Olive oil adds flavor here, not just function.
- 1 small yellow onion, diced — Brings sweetness and depth. Yellow onion caramelizes beautifully and builds the flavor base of the entire filling.
- 1 red bell pepper, diced into ¼–⅓ inch pieces — Sweetness, color, and vitamin C. Red bell peppers are at peak sweetness and nutrition in spring.
- 3 garlic cloves, minced or grated — Non-negotiable. Garlic makes everything better. Use fresh, not jarred, for the best results.
- 1 zucchini, diced into ½-inch pieces (or yellow squash) — Spring zucchini is tender, mild, and takes about 3 minutes to cook perfectly. Yellow squash works just as well.
- ½ cup corn (fresh or frozen) — Adds sweetness and a pop of texture that makes every bite more interesting.
- 1 cup fresh baby spinach, packed — Wilts down quickly and adds iron, vitamin A, and gorgeous green color to the filling.
- 1 cup cooked quinoa (white, red, or tri-color) — The protein powerhouse of this recipe. Quinoa makes the filling hearty enough to serve as a main course.
Spices
- ½ tsp dried oregano — Earthy and herby. Pairs beautifully with mushrooms and bell pepper.
- ½ tsp smoked paprika — This is the secret weapon. Smoked paprika adds a subtle depth and warmth that elevates the whole filling.
- ½ tsp salt — Season to taste. Start here and adjust at the end.
Quick Note on Quinoa: The recipe calls for cooked quinoa, not dry. One cup of dry quinoa makes about 3 cups cooked — so you only need roughly ⅓ cup dry. Cook it ahead or use leftovers from meal prep.
Full Nutrition Breakdown — Per Serving (1 Mushroom Cap)
Let’s talk numbers. Each portobello cap delivers a genuinely impressive nutritional profile for just 104 calories. Here’s the full breakdown:
| Nutrient | Per Serving (1 mushroom cap) |
| Calories | 104 kcal |
| Carbohydrates | 14g |
| Protein | 4g |
| Total Fat | 5g |
| Saturated Fat | 1g |
| Fiber | 3g |
| Sugar | 5g |
| Sodium | 161mg |
| Potassium | 512mg |
| Vitamin A | 957 IU |
| Vitamin C | 26mg |
| Calcium | 23mg |
| Iron | 1mg |
This recipe serves 8 people — so if you’re feeding a smaller group, you can halve the recipe easily or save leftover filling for grain bowls, wraps, or tacos the next day. The filling refrigerates beautifully for up to 4 days.
Feeding a bigger crowd? Just scale up. Two caps per person works beautifully as a main course, which means this recipe comfortably serves 4 as a dinner entrée or 8 as an appetizer or side.
Protein Tip: Want more protein per serving? Double the quinoa to 2 cups in the filling, or add a can of rinsed white beans. Both options blend seamlessly with the existing flavors and bump the protein content up significantly.
Step-by-Step Instructions for Vegan Stuffed Portobello with Spring Vegetables
Okay, enough talking about it. Here’s exactly how to make these beauties, with every detail you need to nail them on the first try.
Step 1: Preheat Your Oven
Preheat your oven to 375°F (190°C). Line your large baking sheet with parchment paper. This step takes 30 seconds and saves you from a sticky, mushroom-juice-soaked pan later. Don’t skip it.
Step 2: Pre-Bake Large Caps (If Needed)
If your portobello caps are particularly large or thick, place them upside down on the parchment-lined baking sheet and pre-bake for 3–5 minutes. You’re not cooking them all the way through — just softening them slightly so the final bake time stays short.
You’ll know they’re ready when they feel slightly pliable and have just started to release a little moisture. Pull them out promptly. You don’t want waterlogged mushrooms going into the oven a second time.
Important: Not all caps need pre-baking. Medium-sized caps go straight to filling and final baking. Only pre-bake if they’re notably thick or very large.
Step 3: Sauté Onion and Pepper
Heat 2 tablespoons of olive oil in your large skillet over medium heat. Add the diced onion and red bell pepper. Sauté for 5–10 minutes, stirring occasionally, until both are soft and the onion turns translucent and slightly golden at the edges.
Don’t rush this step. Properly softened onion and pepper build the flavor foundation of the entire filling. Add your minced garlic and sauté for another 2 minutes until fragrant — your kitchen should smell amazing right about now.
Step 4: Add Zucchini, Corn, and Spinach
Add your diced zucchini (and mushroom stems if you’re using them — more on that below) and sauté until just soft, about 3 minutes. Then add the corn and fresh baby spinach.
Cook for another 2 minutes, stirring gently, until the spinach wilts completely. It loses about 80% of its volume when it wilts — that’s totally normal and expected. Remove the skillet from heat.
Stem Tip: Don’t throw away your portobello stems! Snap them off at the base, dice them finely, and add them right here with the zucchini. They add extra mushroom flavor and reduce food waste. Win-win.
Step 5: Add Quinoa and Spices
Stir in your cooked quinoa, smoked paprika, dried oregano, and salt. Mix everything together until fully combined. Now taste it — seriously, taste it. This is your only chance to adjust the salt before everything goes into the mushroom caps.
IMO this is the step most people rush and then wonder why their filling tastes flat. Season it properly now and the finished dish will be noticeably better.
Step 6: Fill and Bake
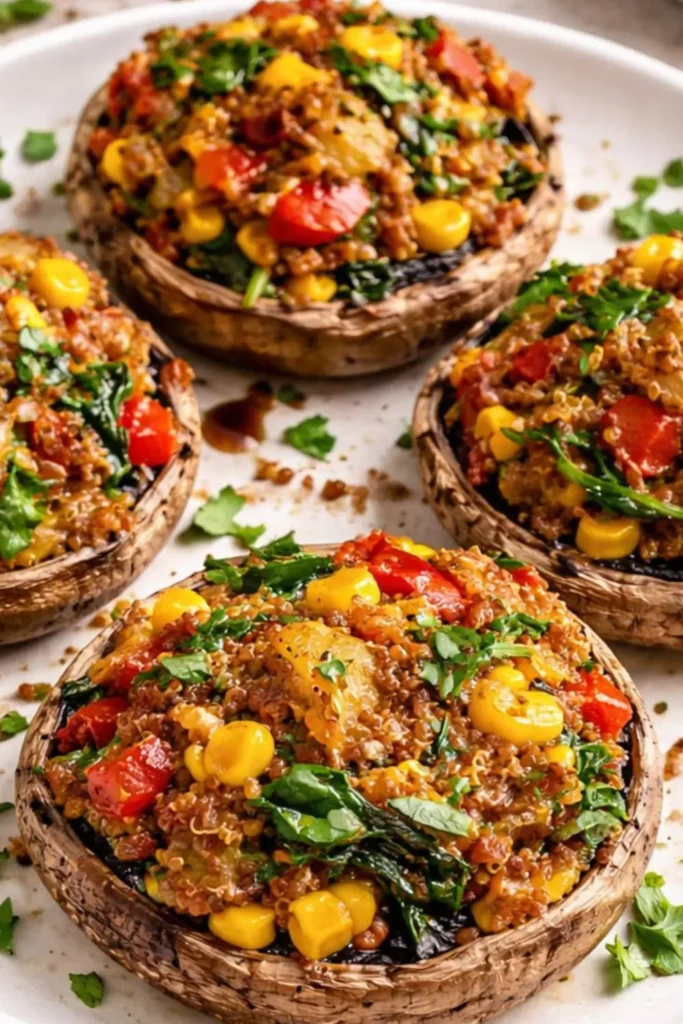
Turn your pre-baked mushroom caps right-side up on the parchment-lined baking sheet. Divide the filling evenly between all 8 caps. Don’t be shy — heap it generously. The filling holds together well and a full, overflowing cap looks (and tastes) far better than a skimpy one.
Bake for 5 minutes, or until the mushrooms are releasing their natural juices and the caps are cooked to your liking. The filling is already fully cooked, so this final bake is purely about finishing the mushrooms themselves.
Pull them out when the juices start pooling around the base of each cap on the baking sheet. That’s your visual cue that they’re perfectly done.
Pro Tips for Perfect Stuffed Portobellos Every Single Time
Remove the Gills
This is the tip that changes everything. Use a spoon to scoop out the dark gills from the underside of each portobello cap before filling. The gills are edible, but they release a dark, murky liquid during baking that can make your filling look muddy and unappetizing.
Take 30 seconds per cap to scoop them out gently and your finished dish will look dramatically cleaner and more appealing on the plate.
Don’t Waterlog Your Mushrooms
Portobello caps hold moisture like tiny sponges. Don’t rinse them under running water — ever. Instead, wipe them clean with a slightly damp paper towel. A wet mushroom steams in the oven instead of roasting, and you end up with a soggy cap and watery filling. Not the vibe.
Let Them Rest
Give your stuffed caps a 2-minute rest after pulling them from the oven. This lets the juices redistribute slightly and makes them easier to plate and serve without everything sliding around.
Use a Hot Skillet for the Filling
Medium heat is your friend for the sauté steps. Too low and your vegetables steam rather than sauté, losing their color and texture. Too high and your garlic burns. Medium heat gives you golden, flavorful vegetables with great texture — exactly what you want here.
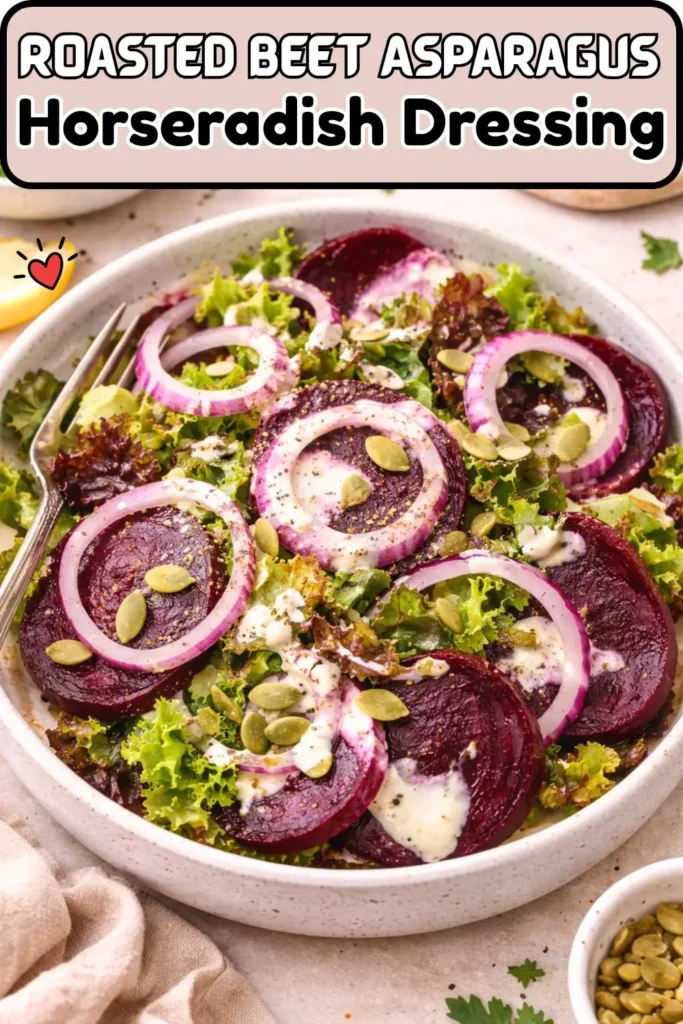
Still Hungry, Try It Next recipe :-
Vegan Roasted Beet & Asparagus Grain Bowl with Horseradish Dressing
How to Customize This Recipe — Because One Version Isn’t Enough
One of the best things about this recipe is how endlessly flexible it is. Here are the variations I actually make and love:
Vegetable Swaps
- Yellow squash instead of zucchini — Same texture, slightly sweeter flavor. Works perfectly.
- Frozen peas — Add them with the corn for extra sweetness and protein.
- Double the spinach — If you love your greens, add 2 cups instead of 1. It wilts down significantly anyway.
- Cherry tomatoes — Halved and added in the last 2 minutes of sautéing. They burst and add incredible brightness.
- Chopped artichoke hearts — Jarred artichokes add a meaty, tangy element that’s genuinely special in this filling.
Protein Boosts
- Double the quinoa — Push it to 2 cups for a significantly more filling meal.
- Add white beans — One can of rinsed cannellini or white beans blends seamlessly into the filling and adds substantial protein.
- Crumbled tempeh — Sauté it with the onion and pepper for a hearty, satisfying filling with meaty texture.
The Vegan Cheese Option
Want to make these extra indulgent? Add a generous sprinkle of shredded vegan mozzarella on top of each filled cap before the final bake, or finish with a dusting of vegan parmesan right before serving. Both options add richness and a melty, irresistible finish that makes these feel genuinely decadent.
Serving Style Variations
- Appetizer: Serve one cap per person as a starter for a spring dinner party.
- Main course: Two caps per person with a simple green salad or crusty bread on the side.
- Meal prep: Make the filling ahead and stuff/bake caps fresh each day. The filling keeps for 4 days refrigerated.
- Light lunch: One cap over a bed of arugula with lemon dressing. Genuinely gorgeous.
Why Spring Vegetables Make This Recipe Exceptional
This recipe isn’t just vegan — it’s genuinely seasonal, which matters more than most recipes acknowledge. Spring vegetables hit their nutritional and flavor peak between March and June, and this recipe takes full advantage of that window.
Zucchini in Spring
Spring zucchini is tender, mild, and cooks in under 3 minutes. Summer and fall zucchini can be watery and flavorless, but spring zucchini has this clean, subtly sweet flavor that works beautifully in a sautéed filling. Use it while it’s at its best.
Fresh Baby Spinach
Baby spinach peaks in cool spring weather. Heat causes it to bolt and turn bitter — which is why spring spinach has that clean, mild flavor that works so well here. It wilts quickly, adds iron and vitamin A, and brings gorgeous color to the filling.
Red Bell Peppers
Red bell peppers carry more vitamin C than an orange — 26mg per serving in this recipe alone. Spring peppers are firm, sweet, and at their most flavorful, making them a perfect choice for a filling that’s meant to taste bright and fresh.
Fresh Corn
Fresh spring corn is incredible in this recipe. Its natural sweetness balances the earthiness of the mushrooms and the smokiness of the paprika perfectly. Frozen corn works absolutely fine off-season, but if spring corn is at your farmers market — grab it.
Storage, Make-Ahead, and Meal Prep Tips
Storing Leftovers
Store leftover stuffed caps in an airtight container in the refrigerator for up to 3 days. The mushrooms will continue to release moisture as they sit, so they’ll be slightly softer on day 2 and 3 — still delicious, just less perfectly textured than fresh.
Reheating
Reheat in a 350°F oven for 8–10 minutes to restore some of the texture. Microwaving works in a pinch but produces softer results. The oven is always worth the extra 5 minutes here.
Storing Filling Separately
The smarter make-ahead move: Make the filling in full and store it separately in the fridge for up to 4 days. When you’re ready for dinner, just scoop it into fresh caps and bake for 5 minutes. Fresh mushroom cap, ready-made filling, dinner in under 10 minutes.
Freezing
Honestly? Stuffed portobello caps don’t freeze particularly well — the mushroom texture suffers significantly. But the filling freezes beautifully for up to 2 months. Defrost overnight in the fridge, warm in a pan, and stuff into fresh caps.
Meal Prep Hack: Cook a double batch of filling on Sunday. Use it for stuffed portobellos on Monday, grain bowls on Wednesday, and tacos or wraps on Friday. One cook session, three completely different dinners. That’s the kind of efficiency I can get behind.
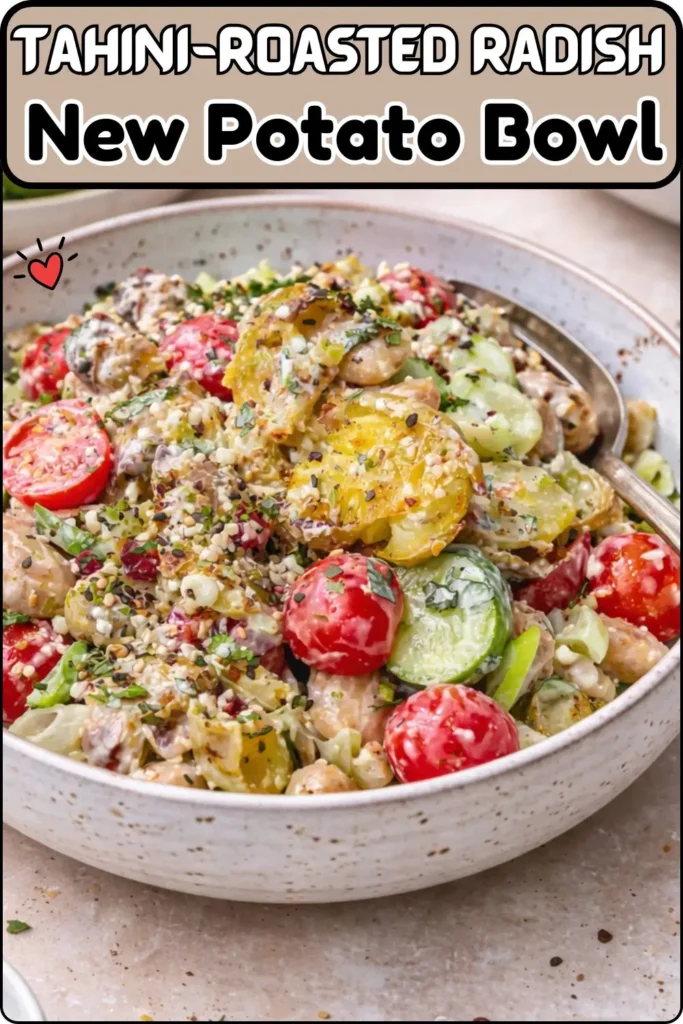
Still Hungry, Try It Next recipe :-
Vegan Tahini-Roasted Radish & New Potato Bowl
Common Mistakes — And How to Avoid Them
I’ve made every one of these mistakes personally, so you don’t have to.
Mistake #1: Washing Mushrooms Under Running Water
This is the single most common mushroom mistake. Portobello caps absorb water instantly and turn into soggy, steaming disasters in the oven. Always — always — use a damp paper towel to wipe them clean instead.
Mistake #2: Not Removing the Gills
The gills are dark, fine structures on the underside of the cap. Skip them and your filling turns muddy and unappetizing-looking from the dark liquid they release. 30 seconds with a spoon fixes this completely.
Mistake #3: Using Raw Quinoa in the Filling
The recipe calls for cooked quinoa. Raw quinoa won’t cook through in the 5-minute bake time and will produce a grainy, undercooked filling. Always cook your quinoa fully before adding it to the skillet.
Mistake #4: Overfilling the Caps
This sounds counterintuitive, but there is such a thing as too full. If your filling is piled so high that it falls off the sides, it won’t heat through evenly. A generous mound that sits just at the rim of the cap is the sweet spot.
Mistake #5: Skipping the Seasoning Taste Test
Taste the filling before it goes into the mushrooms. This is your final chance to adjust salt and seasoning. An under-seasoned filling produces an underwhelming finished dish, and no amount of smoked paprika on top will fix it at that point.
What to Serve With Stuffed Portobello Mushrooms
These caps are great on their own, but they shine even brighter with the right accompaniments. Here are my favorite pairings:
Light Side Salads
- Arugula salad with lemon vinaigrette — The peppery bitterness of arugula cuts through the richness of the mushroom perfectly.
- Simple cucumber and tomato salad — Fresh, cooling, and zero cook time. A perfect contrast to the warm, savory caps.
- Spring berry and balsamic salad — Fancy enough for dinner guests, easy enough for Tuesday night.
Grains and Breads
- Crusty sourdough bread — For scooping up all those incredible mushroom juices from the plate. Don’t leave those behind.
- Garlic herb quinoa — Doubles down on the quinoa in the filling for a cohesive, fully satisfying meal.
- Roasted new potatoes — Simple, hearty, and pairs beautifully with the smoky paprika flavors in the filling.
Sauce Options
- Tahini drizzle — A thin, lemony tahini sauce drizzled over the top adds nutty richness that’s genuinely incredible.
- Vegan pesto — Spoon a little over each cap right before serving for an herby, bright finishing note.
- Cashew cream — Rich, indulgent, and beautiful on the plate. A great option for entertaining.
Frequently Asked Questions
Can I make these ahead of time?
Yes — with a small caveat. The filling keeps perfectly for 4 days in the fridge. The stuffed and baked caps are best eaten the day they’re made. For the best result: make filling ahead, stuff and bake caps fresh.
Are these gluten-free?
Yes, 100% gluten-free as written. Quinoa, portobello mushrooms, and all the vegetables in this recipe are naturally gluten-free. Just ensure your spices haven’t been cross-contaminated if celiac disease is a concern.
Can I use baby bella mushrooms instead of portobello caps?
Baby bellas are actually the same mushroom as portobello — just harvested younger and smaller. They’ll work, but you’ll need significantly more of them and they’ll hold less filling per cap. Portobello caps give you that satisfying, generous serving that makes this recipe worth making.
Can I make this without quinoa?
Absolutely. Try cooked brown rice, farro, or cauliflower rice for a lower-carb option. Each brings slightly different texture but all work well. Cauliflower rice is the lowest-calorie swap and keeps the filling light and fresh-tasting.
What if I don’t have smoked paprika?
Regular paprika works fine — the flavor will be milder and less complex, but the dish will still be delicious. You can also add a drop of liquid smoke if you have it, which replicate the smoky depth nicely.
How many calories for the full recipe?
The full recipe (8 caps) totals approximately 832 calories — about 104 per cap. As a main course serving 4 (2 caps each), that’s roughly 208 calories per person, which leaves plenty of room for a generous side salad or a slice of crusty bread.
Why Vegan Spring Dinners Hit Different
Look, I’m not here to lecture anyone about their dietary choices. But I will say this: spring is genuinely the easiest season to eat plant-based, and recipes like this are exactly why.
Spring produce is doing all the flavor work for you. When you cook with vegetables at the peak of their season, you don’t need meat, cheese, or cream to make a dish feel complete and satisfying. The vegetables themselves are just that good.
Portobello mushrooms bring that meaty, umami depth that makes even committed omnivores sit up and pay attention. Quinoa delivers protein and substance. Smoked paprika adds warmth and complexity. Together, they create a filling that genuinely satisfies — not in a “I guess this is fine” way, but in a “wait, can I have another one?” way.
Every cap delivers 4g of protein, 3g of fiber, 512mg of potassium, and 957 IU of vitamin A at just 104 calories. That’s a nutritional profile that most non-vegan dinners can’t match at the same calorie count. I’m just saying. :/
Spring vegan cooking isn’t about restriction — it’s about using the season’s best ingredients and letting them do exactly what they’re designed to do. This recipe is proof of that.
Final Thoughts — Go Make These Tonight
If you’ve made it this far, you already know everything you need to put these vegan stuffed portobello caps on your table tonight. You’ve got the ingredients list, the step-by-step instructions, the pro tips, the nutritional facts, and enough variations to keep this recipe interesting for the next three months of spring.
Here’s the honest truth: this recipe is one of those rare dishes that delivers way beyond what it asks of you. Thirty minutes, two pieces of cookware, and a handful of fresh spring vegetables — and you get something that looks stunning, tastes incredible, and feeds eight people at 104 calories a cap.
Whether you’re cooking for a skeptical crowd, a hungry family, a solo meal prep session, or a spring dinner party that needs to impress — this recipe handles all of it. And if you’re still on the fence about portobello mushrooms as a main ingredient? Trust me, one bite of a properly stuffed, perfectly baked cap and the fence disappears entirely.
Make the filling. Taste the filling. Stuff those caps generously. And don’t forget to scoop out the gills — your future self will thank you.
Happy spring cooking!
Vegan Stuffed Portobello with Spring Vegetables
Ingredients
Equipment
Method
- Step 1: Preheat Your Oven
- Preheat your oven to 375°F (190°C). Line your large baking sheet with parchment paper. This step takes 30 seconds and saves you from a sticky, mushroom-juice-soaked pan later. Don’t skip it.
- Step 2: Pre-Bake Large Caps (If Needed)
- If your portobello caps are particularly large or thick, place them upside down on the parchment-lined baking sheet and pre-bake for 3–5 minutes. You’re not cooking them all the way through — just softening them slightly so the final bake time stays short.
- You’ll know they’re ready when they feel slightly pliable and have just started to release a little moisture. Pull them out promptly. You don’t want waterlogged mushrooms going into the oven a second time.
- ⚠️ Important: Not all caps need pre-baking. Medium-sized caps go straight to filling and final baking. Only pre-bake if they’re notably thick or very large.
- Step 3: Sauté Onion and Pepper
- Heat 2 tablespoons of olive oil in your large skillet over medium heat. Add the diced onion and red bell pepper. Sauté for 5–10 minutes, stirring occasionally, until both are soft and the onion turns translucent and slightly golden at the edges.
- Don’t rush this step. Properly softened onion and pepper build the flavor foundation of the entire filling. Add your minced garlic and sauté for another 2 minutes until fragrant — your kitchen should smell amazing right about now.
- Step 4: Add Zucchini, Corn, and Spinach
- Add your diced zucchini (and mushroom stems if you’re using them — more on that below) and sauté until just soft, about 3 minutes. Then add the corn and fresh baby spinach.
- Cook for another 2 minutes, stirring gently, until the spinach wilts completely. It loses about 80% of its volume when it wilts — that’s totally normal and expected. Remove the skillet from heat.
- Step 5: Add Quinoa and Spices
- Stir in your cooked quinoa, smoked paprika, dried oregano, and salt. Mix everything together until fully combined. Now taste it — seriously, taste it. This is your only chance to adjust the salt before everything goes into the mushroom caps.
- IMO this is the step most people rush and then wonder why their filling tastes flat. Season it properly now and the finished dish will be noticeably better.
- Step 6: Fill and Bake
- Turn your pre-baked mushroom caps right-side up on the parchment-lined baking sheet. Divide the filling evenly between all 8 caps. Don’t be shy — heap it generously. The filling holds together well and a full, overflowing cap looks (and tastes) far better than a skimpy one.
- Bake for 5 minutes, or until the mushrooms are releasing their natural juices and the caps are cooked to your liking. The filling is already fully cooked, so this final bake is purely about finishing the mushrooms themselves.
- Pull them out when the juices start pooling around the base of each cap on the baking sheet. That’s your visual cue that they’re perfectly done.
Notes
Pro Tips for Perfect Stuffed Portobellos Every Single Time
Remove the Gills
This is the tip that changes everything. Use a spoon to scoop out the dark gills from the underside of each portobello cap before filling. The gills are edible, but they release a dark, murky liquid during baking that can make your filling look muddy and unappetizing. Take 30 seconds per cap to scoop them out gently and your finished dish will look dramatically cleaner and more appealing on the plate.Don’t Waterlog Your Mushrooms
Portobello caps hold moisture like tiny sponges. Don’t rinse them under running water — ever. Instead, wipe them clean with a slightly damp paper towel. A wet mushroom steams in the oven instead of roasting, and you end up with a soggy cap and watery filling. Not the vibe.Let Them Rest
Give your stuffed caps a 2-minute rest after pulling them from the oven. This lets the juices redistribute slightly and makes them easier to plate and serve without everything sliding around.Use a Hot Skillet for the Filling
Medium heat is your friend for the sauté steps. Too low and your vegetables steam rather than sauté, losing their color and texture. Too high and your garlic burns. Medium heat gives you golden, flavorful vegetables with great texture — exactly what you want here.
Hi — I’m Rachel. I’m a wife, a mom, and a home cook who believes that food should bring comfort, joy, and compassion to the table. I live with my family — two hungry little foodies who are my most honest recipe testers — and together we’ve built a kitchen culture that’s all about good food that happens to be 100% vegan. I started this blog because I wanted a place to share the recipes that keep our days moving, the dishes that make weeknights feel a little easier, and the meals that become our little family traditions.